TRANSFERRING ENTRY TO WAITING LIST
- Martin Jennings

- Jul 17, 2025
- 2 min read
How to Transfer an Entry to the Waiting List (if the event has one) with Sublime Timing
Transferring an event entry can seem daunting, but with Sublime Timing, the process is straightforward and user-friendly. Whether you’ve had a change of plans or been hit by illness or injury, this step-by-step guide will walk you through the process of transferring an entry to the waiting list smoothly.

Step 1: Login to Your Account
First, ensure that you’re logged into your Sublime Timing account. This is crucial because only registered participants have the authority to transfer their entries. Navigate to the Sublime Timing website, enter your login credentials, and access your account dashboard in User Area.

Step 2: Click on the Transfer Button
Once in your User Area, locate the event entry you wish to transfer. Next to the event details, you will see a "Transfer" button. Click on this button to initiate the transfer process.

Step 3: Select Transfer to Waiting List
Waiting List Option:
If the event has a waiting list, you have the option to transfer your entry either to the waiting list or to another individual. If you choose to transfer your entry to the waiting list, your entry will be refunded (minus any applicable admin fees) and your place will be offered to the next person on the list.
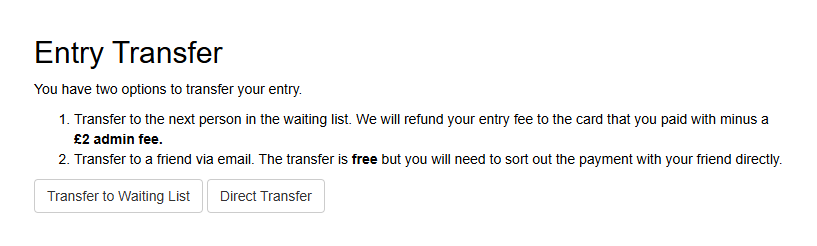
Note: If the event does not have a waiting list, you can still transfer your entry to someone else.
Step 4: Wait for confirmation
The platform will, remove your entry and refund your entry fee to your card, less the admin fee. This will be confirmed by a message on the screen:

Step 5: Email confirmation of your cancellation
You will receive an email from Sublime Timing confirming the cancellation and refund.
For further support with transferring an entry, please email: info@sublimetiming.com


Comments